Tuesday, May 28, 2013

The Cutting Cafe Design Team New Project

Hi everyone.  Today, I am posting a picture for the present Design Team project.  This is link:


Front of the card


Close up of the card

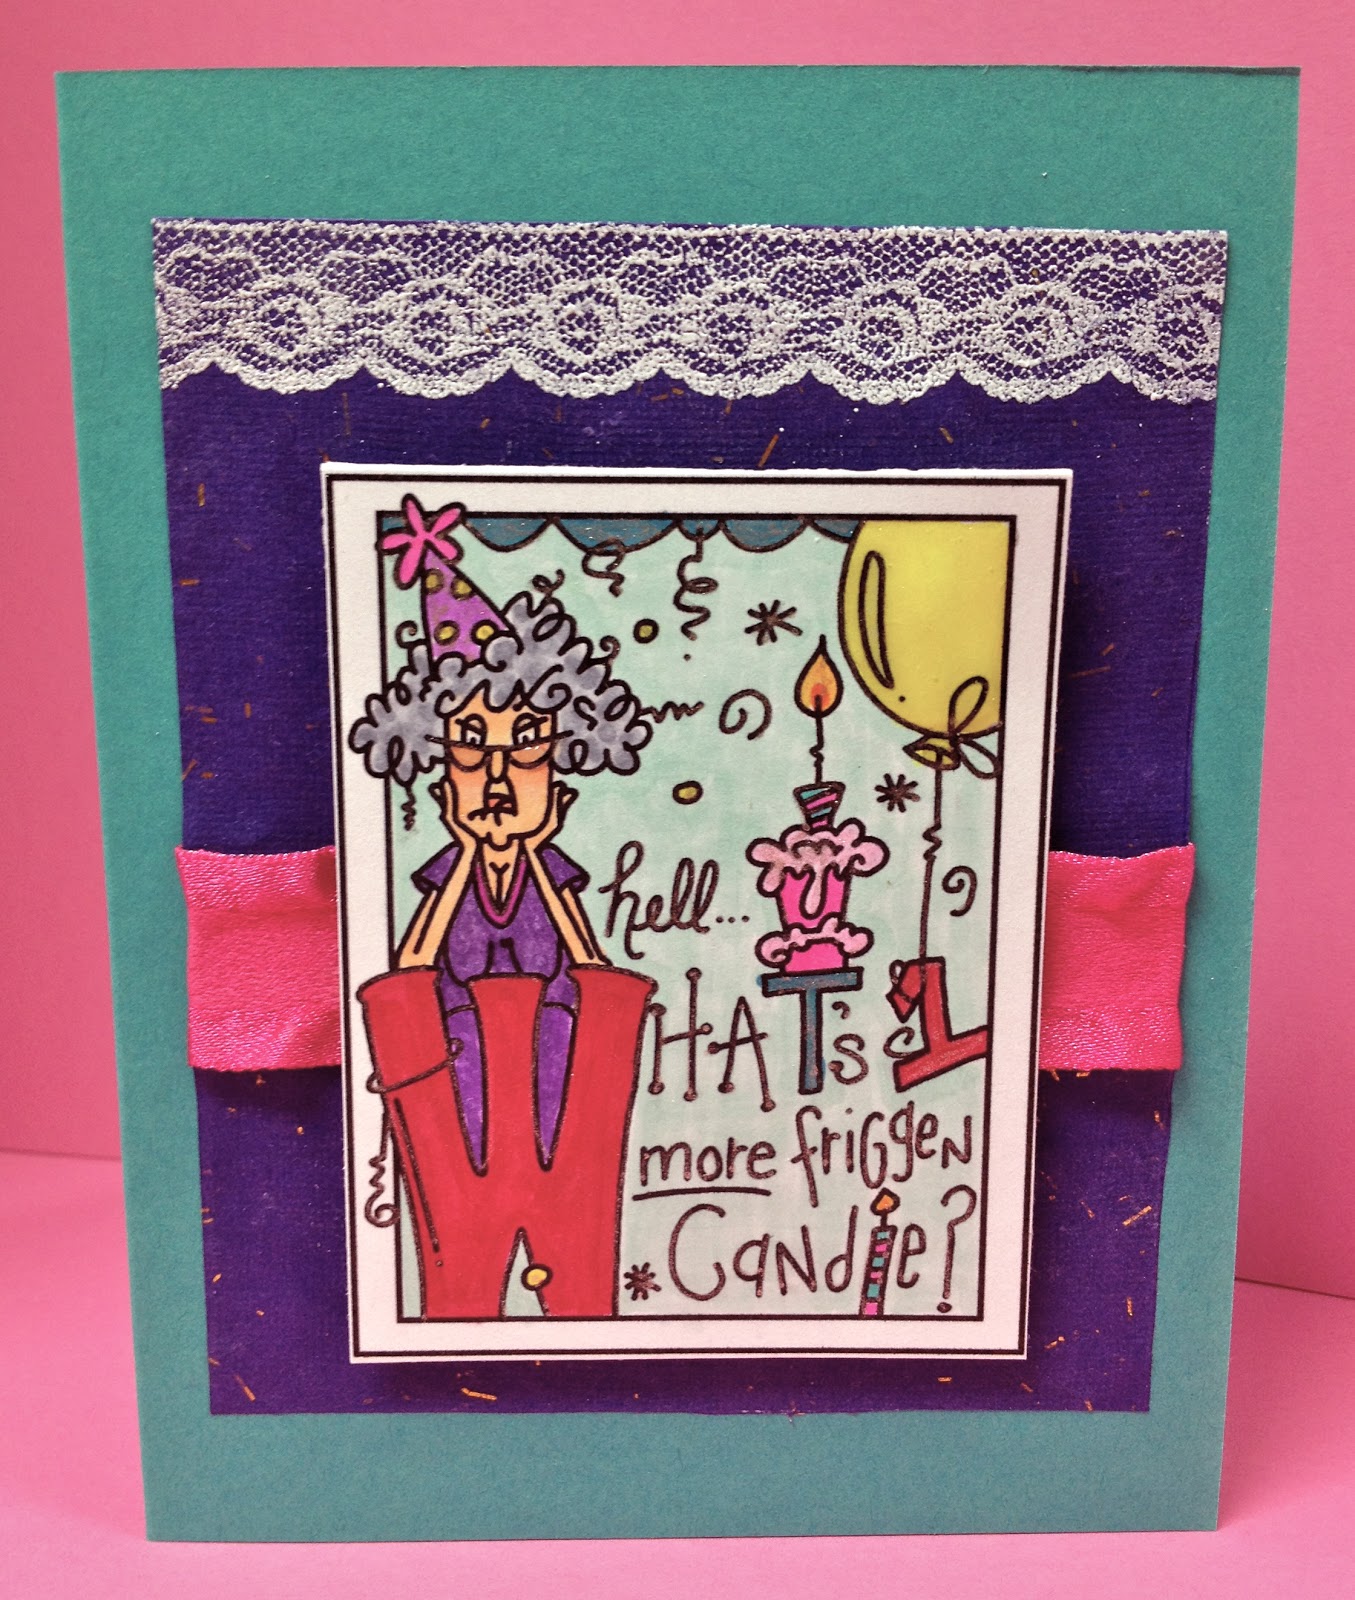
This was not the easiest card I have made, but I think it turned out pretty nice.  I plan on making an envelope for it, but I didn't have time since it took me all week, just to complete the card.  First of all,  
I didn't have the software that I needed for my new Silhouette Portrait machine and I finally had to pay the price and download it so I can use it for future projects that need to be cut.  I finally was able to get the cut files and the jpg files, the same size.  That in itself was an issue.  I finally finished it last night.  (Better late than never  ;-) )  So, I cut the view finder with the Silhouette.  I also cut a plain circle for the back to make the card open.  I used my Nestabilities large circle to cut out the black circle with the different sayings on it, as well as a 4th circle to cover up the brad that I used to put the top 2 pieces together and adhered it to the back of the black circle (on the inside of the card).  I also used a smaller Nestabilities circle to cut out the saying and colored it with colored pencils.  The little cut arrow is to point to a saying when you turn the card.  I used pop dots to lift it up the smaller circle a little and enabled the card to spin around the brad.  I know this sounds complicated, and it was a bit, but I really have a sense of pride that I was able to figure it all out and make it look pretty good!  It was worth it in the end.  The files from The Cutting Cafe work well with Make the Cut (MTC) as well as other machines that do cut files from the computer.  They have some great digital as well as cutting files.  Take a few minutes to check them out.

If you would like further instructions for this cute card, please feel free to either email me or leave me a message and I will be glad to help out.  Thanks for looking.

Until next time...

Friday, May 24, 2013

Oldie but Goodie...

Hi everyone.  I decided to put this card on to my blog today.  Even though I made it a while back, I decided that I wanted to show it here.  I is made from a digi stamp from Bugaboo Stamps.  Jodie does such a great job with her characters and I really wanted to show one of them off.  Her name is Stella and she can be quite the biatch (if you know what I mean).  She is such a hoot and I love to make cards with her.  She always gets a good laugh!


I colored the image with Copic markers.  The lace on the top was a wheel stamp from Stampin' Up that I took off the wheel and mounted it onto cling foam.  Don't you just love her attitude?

Enjoy!
Till next time...

Tuesday, May 21, 2013

One For the Challenge and One for the Team

I have 2 new cards to show you today.  

My first card for The Cutting Cafe design team.  The digi files are Keep Calm and Have a 
Great Birthday.  They also have some great cut files that go with same theme.  I really wanted to do a cut file card, but I found out that my new machine will not take the type of files that I need and I even tried to use my old Cricut that I have previously used with the Sure Cuts a Lot program, but apparently, the software is old and is no longer being supported.  Eventually, I will figure out a way to use one of my machines to cut the SVG files although it will cost me!!


I used the digi stamp and made it big so it would be the focal point.  I added a thin line of score tape on the edges of the main layer.  I added turquoise glitter to frame it.  I sponged the layer with purple and yellow ink.  The dragon flies were hand stamped and painted purple.  I added some Clear Star for a little sparkle and drew the little dots to make them look like they were flying.  Since the balloons were black, I added some Crystal Effects over them and sprinkled the turquoise and purple glitter on them while they were still wet.  Check out the closeup below to see the dimension.  Trust me, it looks better in person than it does in the picture!


I added layers of yellow and black and ribbon to the white card.  I think the color combination 
makes the whole thing pop.  I plan on giving this card to my daughter for her birthday.  She loves dragonflies and, well, she does like to party...luckily, she does not go on my blog, so she won't see 
this before she gets it.  Wink, wink...

This is the file that I used to make this card:


The second card is for the
Imagine That Progressive Challenge
The stamp set is called Party Animals, my card is called the Turtle and the Frog.


At first, I didn't have any idea how I was going to do this card.  I decided to color the turtle with some interesting designs.  If you check out the above link, you will see what I have done differently from the actual digi stamp.  I colored everything with Copic markers.  I  used a Nestabilities die to cut the shape and while it was still in the die, I sponged the light blue and green for the sky and the grass.  I used a Sakura Clear Star pen to give a little sparkle around the balloon and hat.  The background was sponged with different colored inks.  The vine die is from My Favorite Things and was added to give more dimension and balance.


Just a side note:  I have noticed that a lot of people are looking at my blog, but are not leaving comments.  I would really appreciate it if you would click on comments at the end of each post and at least let me know you were here and let me know what you think!  Thanks.  

Until next time...


Tuesday, May 14, 2013

Challenge Card

I made another card for the Imagine That progressive challenge.  It is due today and I 
just got it in under the wire!


The verse and the rose are digital stamps from Imagine That Digi Stamps.  I die cut the sentiment with Nestabilities and sponged it while it was still in the die.  The rose was colored with Copic markers and outlined with a Sakura clear star pen.  I added little dots that look like water droplets.  The rose is hand cut-out twice and I put dimensionals between them.  You can't see the affect in the picture.  The black panel is embossed with a Cuttlebug and I added small pearls in the corners.  The most difficult part was the fussy cutting that I had to do.  Enjoy!

Till next time...

Sunday, May 12, 2013

New Design Team!

Hi everyone.  It sure has been a while since I last posted.  There is a reason for that...I have been away on a transatlantic cruise and I am trying to catch up!  When I got back, I found out that I made it on a new design team.  The site is The Cutting Cafe.  They do wonderful things there!  They offer a lot of digi stamp and SVG cut files that can be downloaded.  Since this is my first project with them, I was a little uncertain, how to begin.  I have never done any work with cut files in years.  I have a new Silouhette Portrait in the box, waiting to be opened and "learned", so...I had to cut the files out by hand!
Hopefully, by the time I do the next one, I will be able to use my wonderful new machine!             

         Coffee Cup Gift Card Holder                 

I sponged the edges and the lid.  I used Momento ink to color the wrapper and the heart.  I pop dotted the digi striped circle and heart (sentiment) circles, after cutting them with Nestabilities.  The tag was also from the set.  I decided to punch and color the palm trees to add a little more interest.  I am giving this to my husband, Jack, with a Starbucks gift card, (in the holder, inside) for his birthday in June.
Shhh, don't tell him!

The files that I used to make this card are:
Coffee Cup Shaped Card

and

Got Coffee Printable Stamp Set

I hope you enjoy...

Till next time!